构建 SyterKit 作为 Bootloader
SyterKit 是一个纯裸机框架,用于 TinyVision 或者其他 v851se/v851s/v851s3/v853 等芯片的开发板,SyterKit 使用 CMake 作为构建系统构建,支持多种应用与多种外设驱动。同时 SyterKit 也具有启动引导的功能,可以替代 U-Boot 实现快速启动
获取 SyterKit 源码
SyterKit 源码位于GitHub,可以前往下载。
git clone https://github.com/YuzukiHD/SyterKit.git
从零构建 SyterKit
构建 SyterKit 非常简单,只需要在 Linux 操作系统中安装配置环境即可编译。SyterKit 需要的软件包有:
gcc-arm-none-eabiCMake
对于常用的 Ubuntu 系统,可以通过如下命令安装
sudo apt-get update
sudo apt-get install gcc-arm-none-eabi cmake build-essential -y
然后新建一个文件夹存放编译的输出文件,并且进入这个文件夹
mkdir build
cd build
然后运行命令编译 SyterKit
cmake ..
make
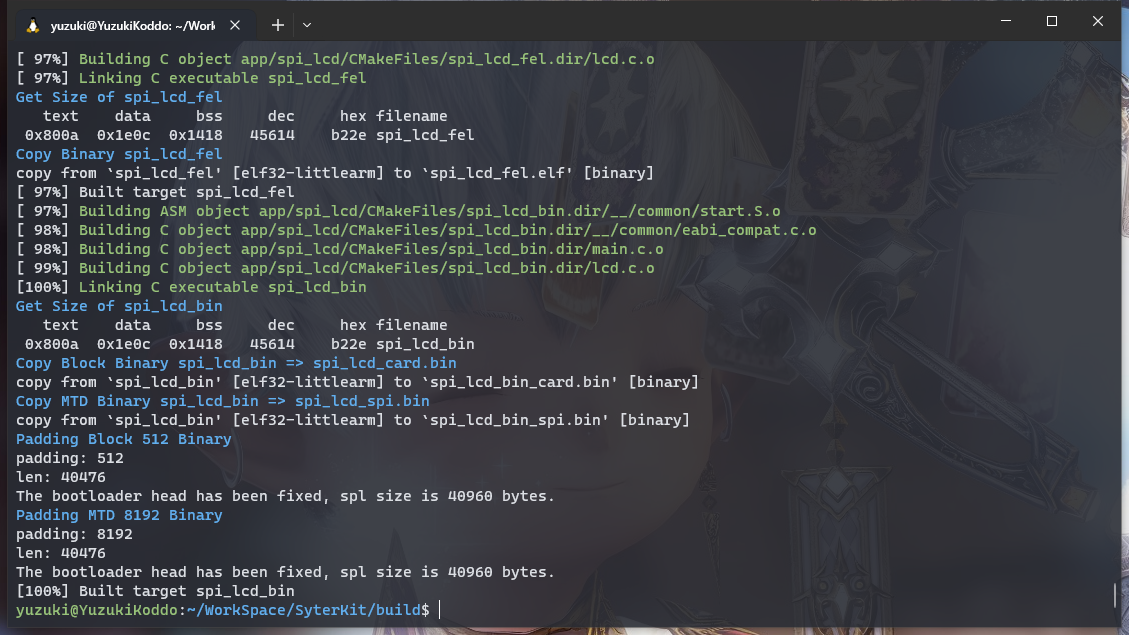
编译后的可执行文件位于 build/app 中,这里包括 SyterKit 的多种APP可供使用。

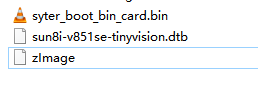
这里我们使用的是 syter_boot 作为启动引导。进入 syter_boot 文件夹,可以看到这些文件

由于 TinyVision 是 TF 卡启动,所以我们需要用到 syter_boot_bin_card.bin
编译 Linux-6.1 内核
由于 Debian 12 配套的内核是 Linux 6.1 LTS,所以这里我们选择构建 Linux 6.1 版本内核。
搭建编译环境
安装一些必要的安装包
sudo apt-get update && sudo apt-get install -y gcc-arm-none-eabi gcc-arm-linux-gnueabihf g++-arm-linux-gnueabihf build-essential libncurses5-dev zlib1g-dev gawk flex bison quilt libssl-dev xsltproc libxml-parser-perl mercurial bzr ecj cvs unzip lsof
获取内核源码
内核源码托管在 Github 上,可以直接获取到,这里使用 --depth=1 指定 git 深度为 1 加速下载。
git clone http://github.com/YuzukiHD/TinyVision --depth=1
然后进入内核文件夹
cd kernel/linux-6.1
配置内核选项
应用 defconfig
CROSS_COMPILE=arm-linux-gnueabihf- make ARCH=arm tinyvision_defconfig
进入 menuconfig 配置选项
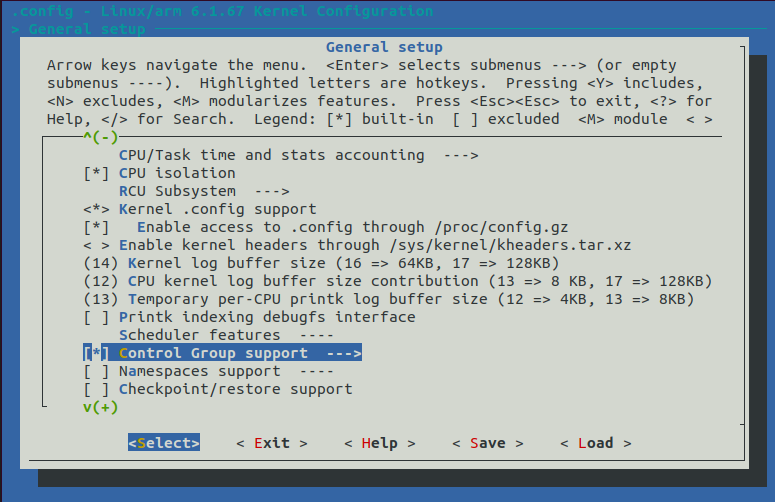
CROSS_COMPILE=arm-linux-gnueabihf- make ARCH=arm menuconfig
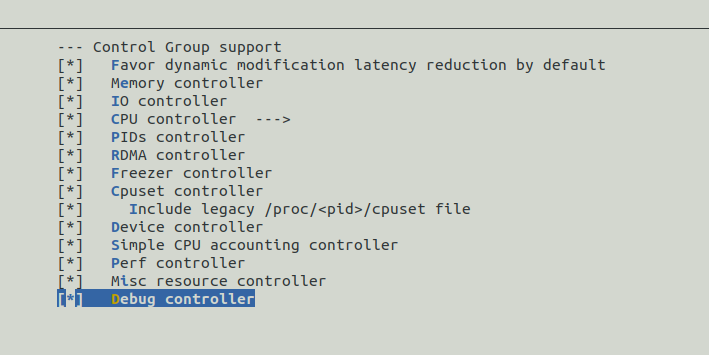
进入 General Setup ->,选中 Control Group Support
前往 File Systems 找到 FUSE (Filesystem in Userspace) support

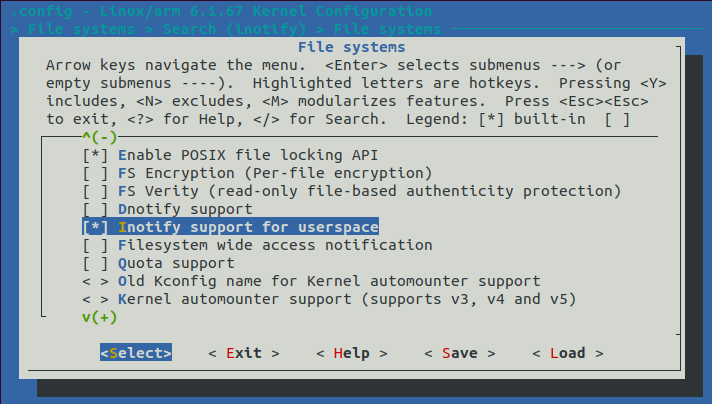
前往 File Systems 找到 Inotify support for userspace
编译内核
CROSS_COMPILE=arm-linux-gnueabihf- make ARCH=arm
使用 debootstrap 构建 debian rootfs
准备环境,依赖
下载安装依赖环境
sudo apt install debootstrap qemu qemu-user-static qemu-system qemu-utils qemu-system-misc binfmt-support dpkg-cross debian-ports-archive-keyring --no-install-recommends
生成目标镜像,配置环境,这里我们生成一个 1024M 的镜像文件用于存放 rootfs
dd if=/dev/zero of=rootfs.img bs=1M count=1024
mkdir rootfs
mkfs.ext4 rootfs.img
sudo mount rootfs.img rootfs
开始构建基础 rootfs
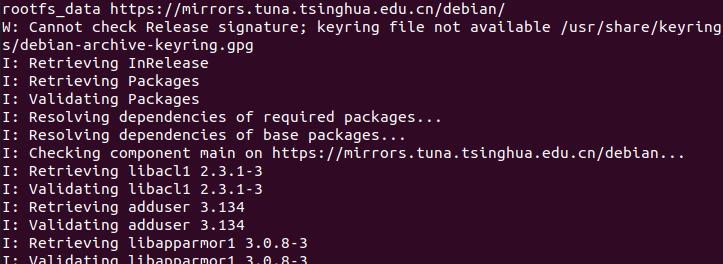
这里我们选择最新的 debian12 (bookwarm) 作为目标镜像,使用清华源来构建,输出到目标目录 rootfs_data 文件夹中。新版本的 debootstrap 只需要运行一次即可完成两次 stage 的操作,相较于老版本方便许多。
sudo debootstrap --arch=armhf bookworm rootfs_data https://mirrors.tuna.tsinghua.edu.cn/debian/
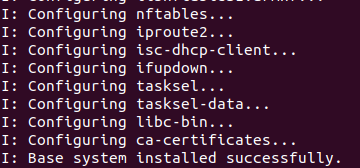
看到 I: Base system installed successfully. 就是构建完成了
等待构建完成后,使用chroot进入到目录,这里编写一个挂载脚本方便挂载使用,新建文件 ch-mount.sh 并写入以下内容:
#!/bin/bash

function mnt() {
    echo "MOUNTING"
    sudo mount -t proc /proc ${2}proc
    sudo mount -t sysfs /sys ${2}sys
    sudo mount -o bind /dev ${2}dev
    sudo mount -o bind /dev/pts ${2}dev/pts
    sudo chroot ${2}
}

function umnt() {
    echo "UNMOUNTING"
    sudo umount ${2}proc
    sudo umount ${2}sys
    sudo umount ${2}dev/pts
    sudo umount ${2}dev

}

if [ "$1" == "-m" ] && [ -n "$2" ] ;
then
    mnt $1 $2
elif [ "$1" == "-u" ] && [ -n "$2" ];
then
    umnt $1 $2
else
    echo ""
    echo "Either 1'st, 2'nd or both parameters were missing"
    echo ""
    echo "1'st parameter can be one of these: -m(mount) OR -u(umount)"
    echo "2'nd parameter is the full path of rootfs directory(with trailing '/')"
    echo ""
    echo "For example: ch-mount -m /media/sdcard/"
    echo ""
    echo 1st parameter : ${1}
    echo 2nd parameter : ${2}
fi
然后赋予脚本执行的权限
chmod 777 ch-mount.sh
- 使用
./ch-mount.sh -m rootfs_data挂载 - 使用
./ch-mount.sh -u rootfs_data卸载
执行挂载,可以看到进入了 debian 的 rootfs

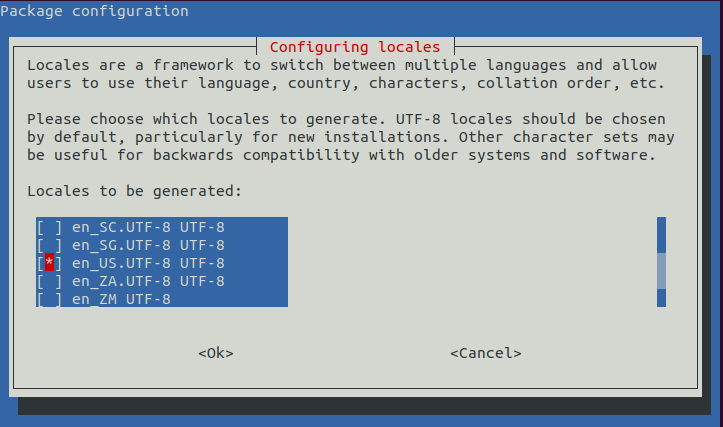
配置系统字符集,选择 en_US 作为默认字符集
export LC_ALL=en_US.UTF-8
apt-get install locales
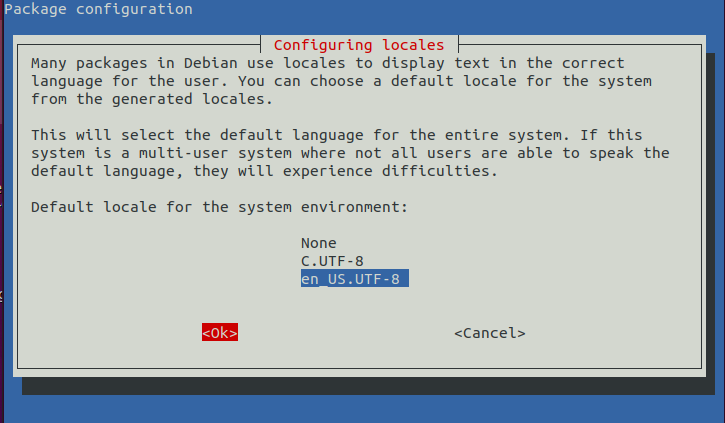
dpkg-reconfigure locales
选择一个就可以
直接 OK 下一步
安装 Linux 基础工具
apt install sudo ssh openssh-server net-tools ethtool wireless-tools network-manager iputils-ping rsyslog alsa-utils bash-completion gnupg busybox kmod wget git curl --no-install-recommends
安装编译工具
apt install build-essential
安装 Linux nerd 工具
apt install vim nano neofetch
设置本机入口 ip 地址
cat <<EOF > /etc/hosts
127.0.0.1       localhost
127.0.1.1       $HOST
::1             localhost ip6-localhost ip6-loopback
ff02::1         ip6-allnodes
ff02::2         ip6-allrouters
EOF
配置网卡
mkdir -p /etc/network
cat >/etc/network/interfaces <<EOF
auto lo
iface lo inet loopback

auto eth0
iface eth0 inet dhcp
EOF
配置 DNS 地址
cat >/etc/resolv.conf <<EOF
nameserver 1.1.1.1
nameserver 8.8.8.8
EOF
配置分区
cat >/etc/fstab <<EOF
#<file system> <mount point>   <type>  <options>       <dump>  <pass>
/dev/mmcblk0p1  /boot   vfat    defaults                0       0
/dev/mmcblk0p2  /       ext4    defaults,noatime        0       1
EOF
配置 root 密码
passwd
配置主机名
echo TinyVision > /etc/hostname
退出 chroot
exit
取消挂载 chroot
./ch-mount.sh -u rootfs_data/
拷贝 rootfs 到镜像中
sudo cp -raf rootfs_data/* rootfs
取消挂载
sudo umount rootfs
至此 debian rootfs 就制作好了。
打包固件
编译完成 bootloader,内核,rootfs 后,还需要打包固件成为可以 dd 写入的固件,这里我们使用 genimage 工具来生成构建。
生成刷机镜像
编译内核后,可以在文件夹 arch/arm/boot/dts/allwinner 生成sun8i-v851se-tinyvision.dtb ,在文件夹arch/arm/boot 生成 zImage ,把他们拷贝出来。
然后将 sun8i-v851se-tinyvision.dtb 改名为 sunxi.dtb ,这个设备树名称是定义在 SyterKit 源码中的,如果之前修改了 SyterKit 的源码需要修改到对应的名称,SyterKit 会去读取这个设备树。
然后编写一个 config.txt 作为配置文件
[configs]
bootargs=root=/dev/mmcblk0p2 earlyprintk=sunxi-uart,0x02500000 loglevel=2 initcall_debug=0 rootwait console=ttyS0 init=/sbin/init
mac_addr=4a:13:e4:f9:79:75
bootdelay=3
安装 GENIMAGE
这里我们使用 genimage 作为打包工具
sudo apt-get install libconfuse-dev #安装genimage依赖库
sudo apt-get install genext2fs      # 制作镜像时genimage将会用到
git clone https://github.com/pengutronix/genimage.git
cd genimage
./autogen.sh                        # 配置生成configure
./configure                         # 配置生成makefile
make
sudo make install
编译后运行试一试,这里正常

使用 GENIMAGE 打包固件
编写 genimage.cfg 作为打包的配置
image boot.vfat {
	vfat {
		files = {
			"zImage",
			"sunxi.dtb",
			"config.txt"
		}
	}
	size = 32M
}

image sdcard.img {
	hdimage {}

	partition boot0 {
		in-partition-table = "no"
		image = "syter_boot_bin_card.bin"
		offset = 8K
	}

	partition boot0-gpt {
		in-partition-table = "no"
		image = "syter_boot_bin_card.bin"
		offset = 128K
	}

	partition kernel {
		partition-type = 0xC
		bootable = "true"
		image = "boot.vfat"
	}

	partition rootfs {
		partition-type = 0x83
		bootable = "true"
		image = "rootfs.img"
	}
}
由于genimage的脚本比较复杂,所以编写一个 genimage.sh 作为简易使用的工具
#!/usr/bin/env bash

die() {
  cat <<EOF >&2
Error: $@

Usage: ${0} -c GENIMAGE_CONFIG_FILE
EOF
  exit 1
}

# Parse arguments and put into argument list of the script
opts="$(getopt -n "${0##*/}" -o c: -- "$@")" || exit $?
eval set -- "$opts"

GENIMAGE_TMP="${BUILD_DIR}/genimage.tmp"

while true ; do
	case "$1" in
	-c)
	  GENIMAGE_CFG="${2}";
	  shift 2 ;;
	--) # Discard all non-option parameters
	  shift 1;
	  break ;;
	*)
	  die "unknown option '${1}'" ;;
	esac
done

[ -n "${GENIMAGE_CFG}" ] || die "Missing argument"

# Pass an empty rootpath. genimage makes a full copy of the given rootpath to
# ${GENIMAGE_TMP}/root so passing TARGET_DIR would be a waste of time and disk
# space. We don't rely on genimage to build the rootfs image, just to insert a
# pre-built one in the disk image.

trap 'rm -rf "${ROOTPATH_TMP}"' EXIT
ROOTPATH_TMP="$(mktemp -d)"
GENIMAGE_TMP="$(mktemp -d)"
rm -rf "${GENIMAGE_TMP}"

genimage \
	--rootpath "${ROOTPATH_TMP}"     \
	--tmppath "${GENIMAGE_TMP}"    \
	--inputpath "${BINARIES_DIR}"  \
	--outputpath "${BINARIES_DIR}" \
	--config "${GENIMAGE_CFG}"
准备完成,文件如下所示
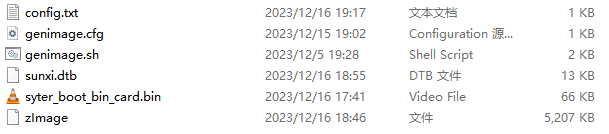
运行命令进行打包
chmod 777 genimage.sh
./genimage.sh -c genimage.cfg
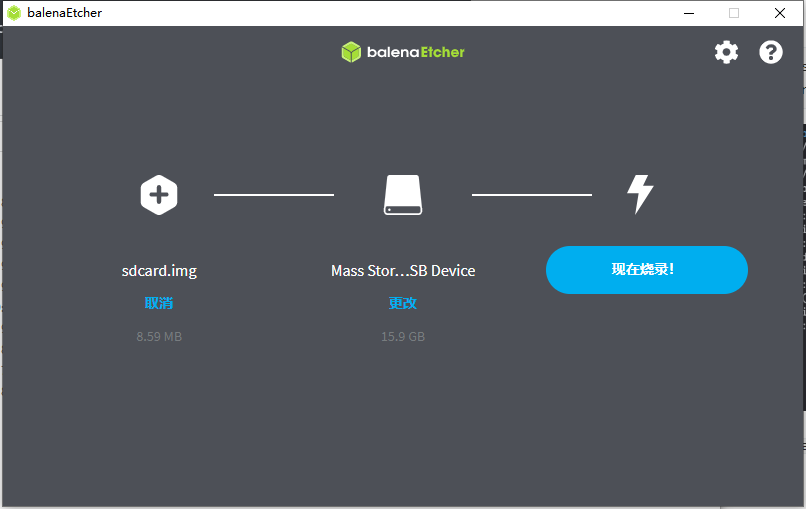
打包完成,可以找到 sdcard.img
使用软件烧录固件到TF卡上